

You are hereHewing a beam from a log
Hewing a beam from a log
I'm making a loft that will be a work area in the barn near our house. I wanted to try making one of the support beams from a pine log. I'm somewhat familiar with the process, having demonstrated the method a number of times at antique tool shows; but that was never with a specific result in mind, just a demonstration of method.
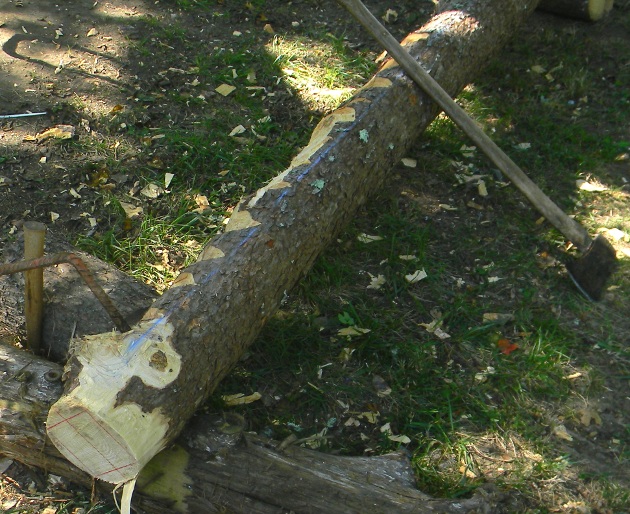
What I'm using is a section of Virginia Pine, a type of Southern Yellow Pine. The first step is to draw a square or rectangle on each end of the log, the size of the finished beam. Next, I snap chalk lines along the length of the log. Then I use a regular axe to make notches every 4 inches or so, going down to the depth shown by the chalk lines. It's important not to go any deeper. Note how the log is raised on, and attached to two shorter sections of log. This to get it at a more comfortable working height and angle. The tools holding it in place are called log dogs, they have the approximate dimensions of giant staples. I make them myself with a forge, then paint them orage so they don't get lost as easily in the woods. The points that stick in the wood are not round, they're flattish. One is turned perpendicular to the long part of the tool, the other flattened point is aligned, or parallel with the long part of the tool. This is important to penetrating the wood grain. Think about how the grain of the upper and lower log goes.
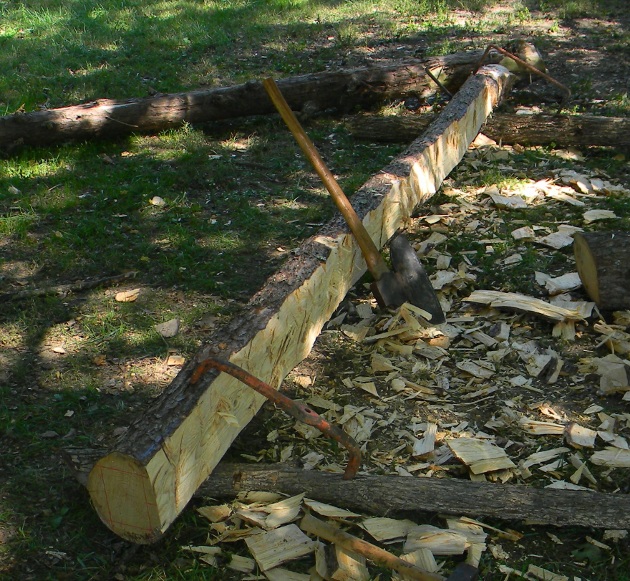
After the notches are made, I roll the log so that the notches are vertical. I also lower the log down onto much smaller wood. Then I use a broadaxe to remove the notch pieces. I found that I can't do a high, fast powerful swing; it's too dangerous. The axe often glances the wood and heads out toward my leg. A shorter chop is much more accurate and productive. I don't know who thought of this combination of tools, but they really do work well together. It seems as though just when I worry about the blade cutting inward at a wrong angle, it moves back out, because it's affected by the bending of the notch section at the next initial chop place; that is, the next vertical chop notch that was put in at the first stage. The broadaxe is that medieval looking tool, but it does this very well, it has a blade that is flat on one side.
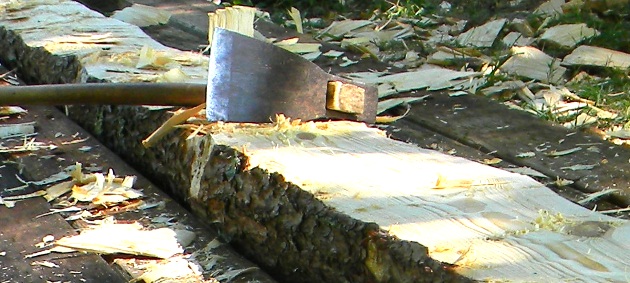
The final stage is to use a foot adze to smooth the wood some. It's very sharp, and one needs to be careful when using it. Notice in this picture how the area in the foreground is smoother than the area behind the adze.
There are more details to this process than what I've discussed here. For instance, I've heard that the adze head should float on the handle, and not be mounted in a fixed way, while others say it should be fixed. The same guy said to use a wood wedge in the center of the handle to hold the head tight; soak it in anti freeze to expand the wood. The anti freeze won't evaporate. That's what he said, but I still use mine floating. I have two types of blows or moves as you might call it. One is a grabbing, chopping type of move, it removes a more significant piece of wood; the other is a glancing sort of blow that shaves a much thinner piece of wood off. With this latter move, a always let the adze head slide up the handle. This glancing blow is done repeatedly, a very rhythmic action. A guy from the past might tell you my methods are baloney, but until I learn otherwise, this works for me.
Also, I read that you stand on top of the log that you are using the adze on, and that the bottom of one shoe is lifted a little at the front; this being a safety measure. I do get better and safer results when I stand on wood that is similar height to the log being worked on.
I read in an old sailing ship account from the 19th century that the foot adze was used by itself for shaping wood; at least that's what the text made it sound like. The book was called "Three years before the mast", or something similar to that. I have been looking closely at old hewn beams lately, and there may be credence to the idea. I have pictures from the basement of The Parker House, a very old building in Knoxville. I'll try to post them later, if they show the work well enough. Anyway, the beams are obviously hand hewn, but very smooth. Usually there is some slight evidence of prior steps, a notch too deep, a broadaxe that angled too aggressively. But not on these beams. They're of a very smooth and excellent craftsmanship; and it's believable that only an adze was used.
There are also two structures near East Union Valley Road in Seymour that have very smoothly finished hewn logs. These however do show the occasional indication of prior steps. One of the new owners of the Wheatlands House on Boyds Creek Road said that the final stage of the hewing process was the drawknife. These two structures lend support to that idea. Speaking of draw knife, here's a link to very easy plans to make a shave seat:
Here's a link to a page showing how I made a home made lathe:
I'll try to post more, as I put the beam in place, or get more info about methods.
 link to